Description: Discover how to enhance your organization’s security by configuring PowerShell Transcription using Microsoft Intune. This comprehensive guide provides detailed, step-by-step instructions to enable PowerShell Transcription, ensuring all commands and outputs are logged for auditing and debugging purposes. Learn how to set up a secure storage location, create a configuration profile, and verify transcription logs with ease.
Introduction to PowerShell Transcription
PowerShell Transcription is a powerful feature in Microsoft PowerShell that captures every command executed in a PowerShell session, along with its output, into a log file. This functionality is crucial for organizations aiming to enhance security, compliance, and debugging capabilities. By enabling transcription, you can maintain a detailed record of all PowerShell activities, including commands, outputs, and errors. However, since sensitive information like passwords may be captured, it’s critical to secure the transcription logs appropriately.
In this blog post, we’ll guide you through configuring PowerShell Transcription using Microsoft Intune, ensuring a robust setup for monitoring and auditing PowerShell activities across your Windows devices.
Prerequisites
Before you begin, ensure you have:
-
Administrative access to Microsoft Intune (via intune.microsoft.com).
-
A Windows 10 or later environment for deploying the configuration.
-
A secure location in mind for storing transcription logs (e.g., a local directory or a file server).
-
Basic familiarity with PowerShell scripting and Intune configuration profiles.
⚠️ Beware: Transcripts may contain sensitive information. If using a shared folder, lock down permissions and only allow IT or security teams to access the logs.
Step-by-Step Configuration Guide
Step 1: Plan the Transcription Storage Location
PowerShell Transcription requires a designated folder to store log files. You have two primary options:
-
-
Local Storage: Save logs on the device, ideally in a secure directory like
C:\Windows\Logs\PowerShellTranscription. -
Network Storage: Save logs on a file server for centralized management (ensure users cannot modify these files).
-
For this guide, we’ll use a local directory: <span class="text-sm px-1 rounded-sm !font-mono bg-sunset/10 text-rust dark:bg-dawn/10 dark:text-dawn">C:\Windows\Logs\PowerShellTranscription</span>. This location is secure as it resides in a system-protected directory, reducing the risk of unauthorized access.
Best Practice: Choose a folder where standard users lack edit permissions to prevent tampering with transcription logs.
Step 2: Deploy a PowerShell Script to Create the Storage Directory
To ensure the storage directory exists on all target devices, we’ll deploy a PowerShell script via Intune to create the folder <span class="text-sm px-1 rounded-sm !font-mono bg-sunset/10 text-rust dark:bg-dawn/10 dark:text-dawn">C:\Windows\Logs\PowerShellTranscription</span>.
-
Create the PowerShell Script:
-
Open a text editor (e.g., Notepad or VS Code).
-
Copy and paste the following script:
-
New-Item -Path "C:\Windows\Logs" -Name "PowerShellTranscription" -ItemType "directory" -Force
-
- Save the script as
"cd PowerShellTranscription.ps1".
- Save the script as
2. Deploy the Script via Intune:
-
-
Navigate to intune.microsoft.com.
-
Go to Devices > Windows > Scripts and remediations.
-
Click Platform scripts > Add.
-

-
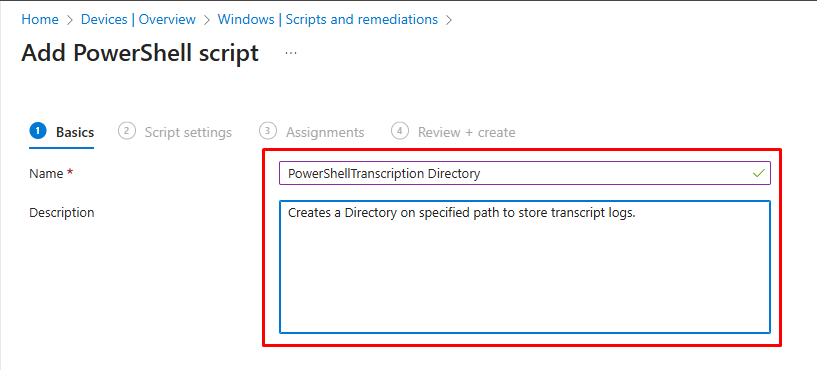
In the Basics tab:
-
Name: Enter
"<span class="text-sm px-1 rounded-sm !font-mono bg-sunset/10 text-rust dark:bg-dawn/10 dark:text-dawn">PowerShellTranscription Directory"</span>. -
Description: (Optional) Add a brief description, e.g.,
"Creates a folder for PowerShell Transcription logs." -
Click Next.
-
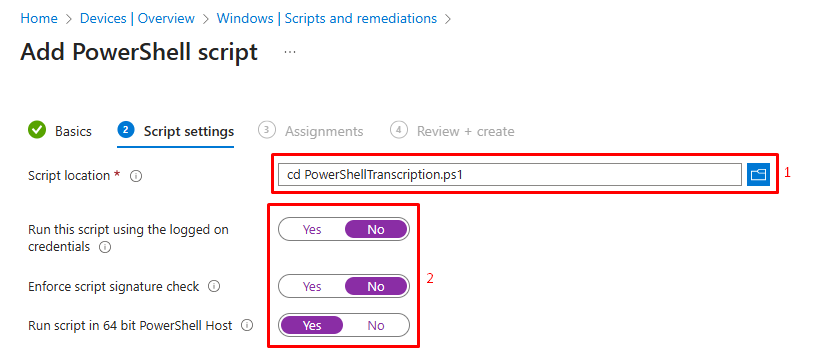
- In the Settings tab:
-
-
Click the folder icon and upload the script
"<span class="text-sm px-1 rounded-sm !font-mono bg-sunset/10 text-rust dark:bg-dawn/10 dark:text-dawn">cd PowerShellTranscription.ps1"</span>. -
Set Run this script using the logged-on credentials: No.
-
Set Enforce script signature check: No.
-
Set Run script in 64-bit PowerShell Host: Yes.
-
Click Next.
-
-
-
In the Assignments tab, assign the script to a group (e.g., All Devices or a specific user/device group).
-
Review and click Add to deploy the script.
-
This script ensures the <span class="text-sm px-1 rounded-sm !font-mono bg-sunset/10 text-rust dark:bg-dawn/10 dark:text-dawn">C:\Windows\Logs\PowerShellTranscription</span> directory is created on all targeted devices.
Step 3: Create a Configuration Profile in Microsoft Intune
Now, configure Intune to enable PowerShell Transcription and specify the storage location.
-
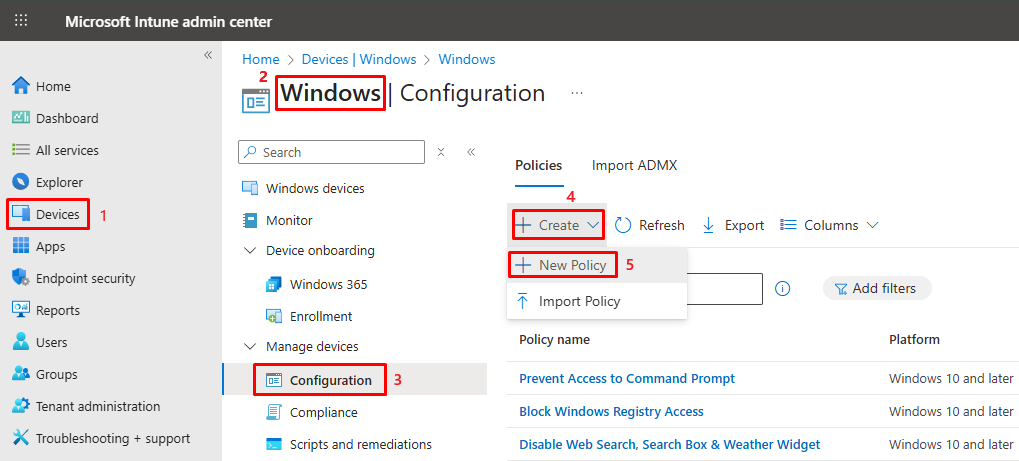
Navigate to Configuration Profiles:
-
Go to intune.microsoft.com.
-
Click Devices > Windows > Configuration profiles.
-
Click Create > New Policy.
-
-
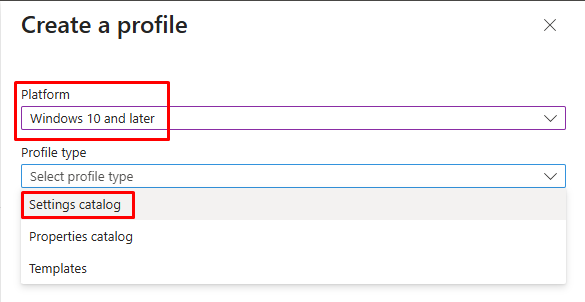
Create a New Policy:
-
Platform: Select Windows 10 and later.
-
Profile type: Select Settings catalog.
-
Click Create.
-
-
Configure the Policy:
-
Basics tab:
-
Name: Enter
"<span class="text-sm px-1 rounded-sm !font-mono bg-sunset/10 text-rust dark:bg-dawn/10 dark:text-dawn">Audit PowerShell Transcription"</span>. -
Description: (Optional) Add a description, e.g.,
"Records every command and its output for every PowerShell session."
-
-
-
-
- Click Next.

- Click Next.
-
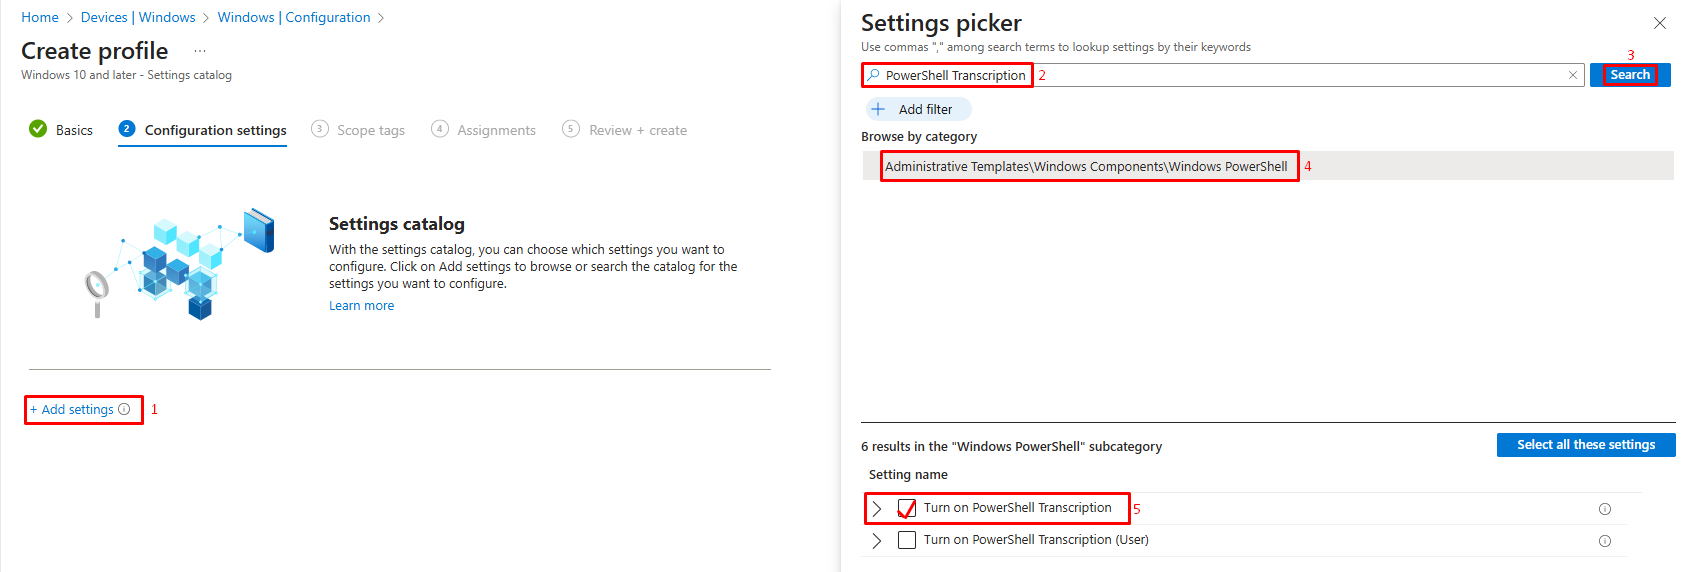
Configuration settings tab:
-
Click Add settings.
-
Search for
<span class="text-sm px-1 rounded-sm !font-mono bg-sunset/10 text-rust dark:bg-dawn/10 dark:text-dawn">PowerShell Transcription</span>. -
Select Administrative Templates\Windows Components\Windows PowerShell.
-
Check Turn on PowerShell Transcription.
-
-
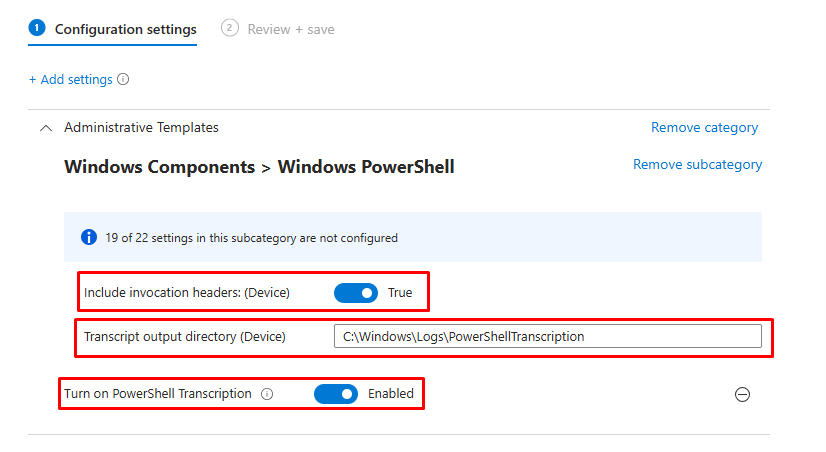
Configure the setting:
-
Set Turn on PowerShell Transcription: Enabled.
-
In Transcription output directory, enter
<span class="text-sm px-1 rounded-sm !font-mono bg-sunset/10 text-rust dark:bg-dawn/10 dark:text-dawn">C:\Windows\Logs\PowerShellTranscription</span>. -
Close the settings picker and click Next.
-
-
Scope tags tab: Assign scope tags if applicable, then click Next.
-
Assignments tab: Assign the policy to a group (e.g., All Devices or a specific user/device group).
-
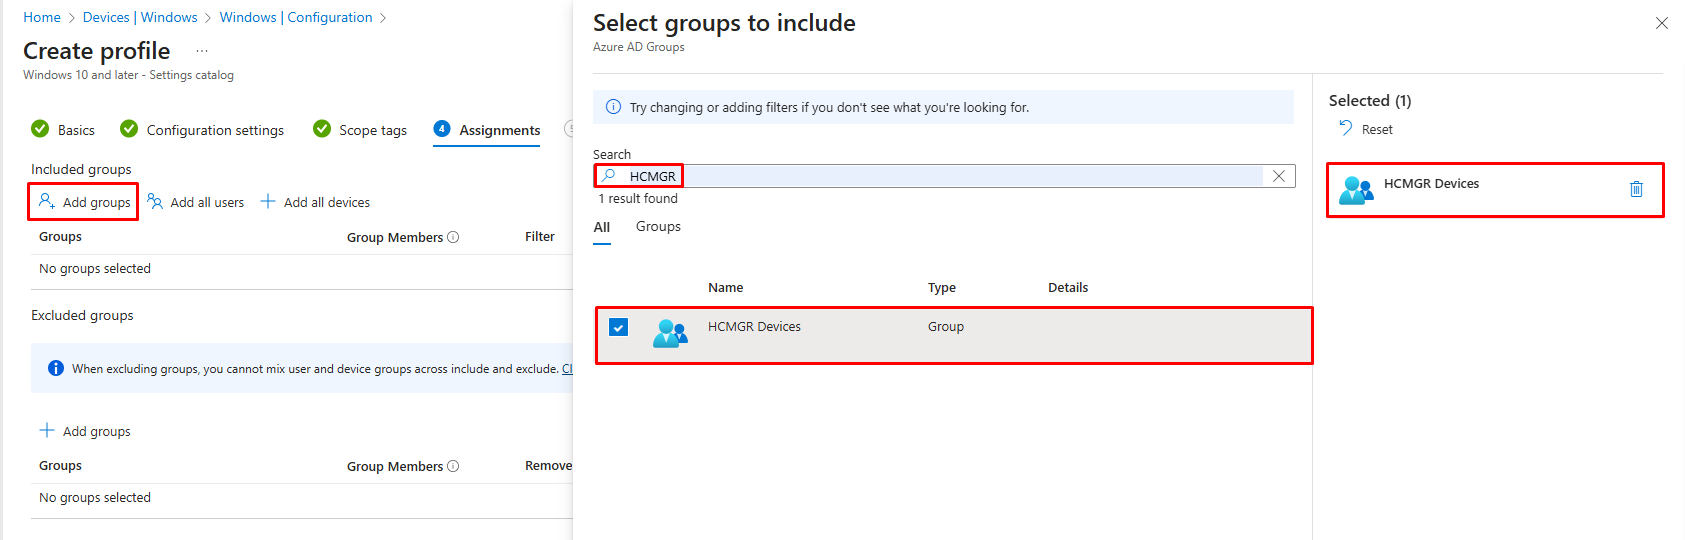
-
-
Review + create tab: Review the settings and click Create.
-
This policy enables PowerShell Transcription and directs logs to the specified folder.
Step 4: Verify PowerShell Transcription Logs
To confirm that PowerShell Transcription is working:
-
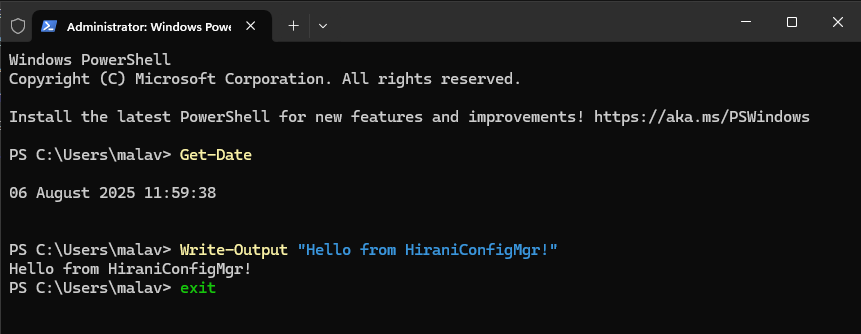
On a target device, open a PowerShell session (run powershell or pwsh).
-
Execute a few commands on a target device, e.g.:
-
Get-Date
Write-Output "Testing PowerShell Transcription"
dir
-
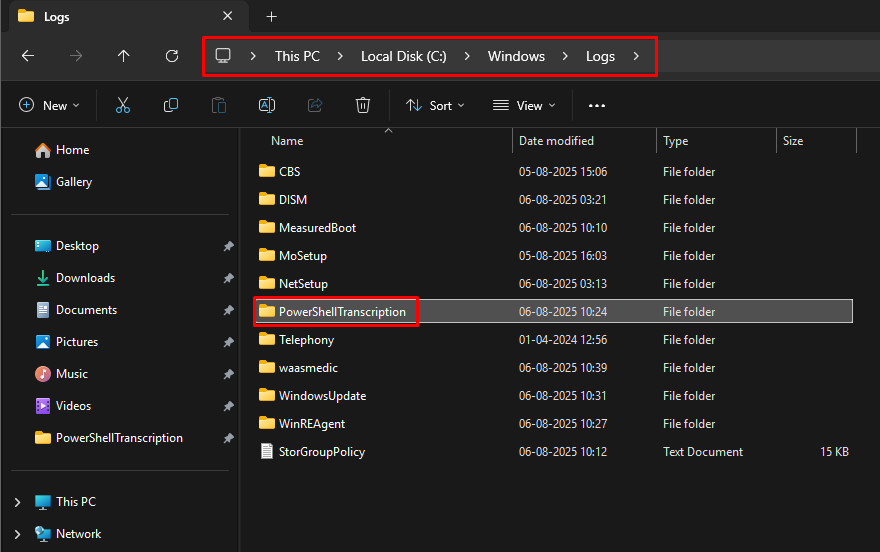
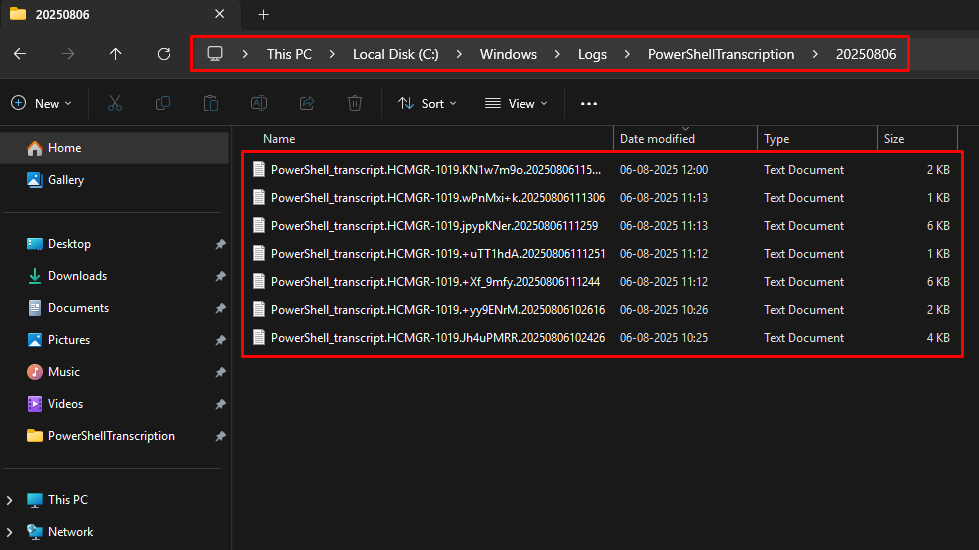
Navigate to
<span class="text-sm px-1 rounded-sm !font-mono bg-sunset/10 text-rust dark:bg-dawn/10 dark:text-dawn">C:\Windows\Logs\PowerShellTranscription</span>on the device. -
Check for a new
<span class="text-sm px-1 rounded-sm !font-mono bg-sunset/10 text-rust dark:bg-dawn/10 dark:text-dawn">.txt</span> file(e.g.,<span class="text-sm px-1 rounded-sm !font-mono bg-sunset/10 text-rust dark:bg-dawn/10 dark:text-dawn">PowerShell_transcript.<hostname>.<timestamp>.txt</span>).
-
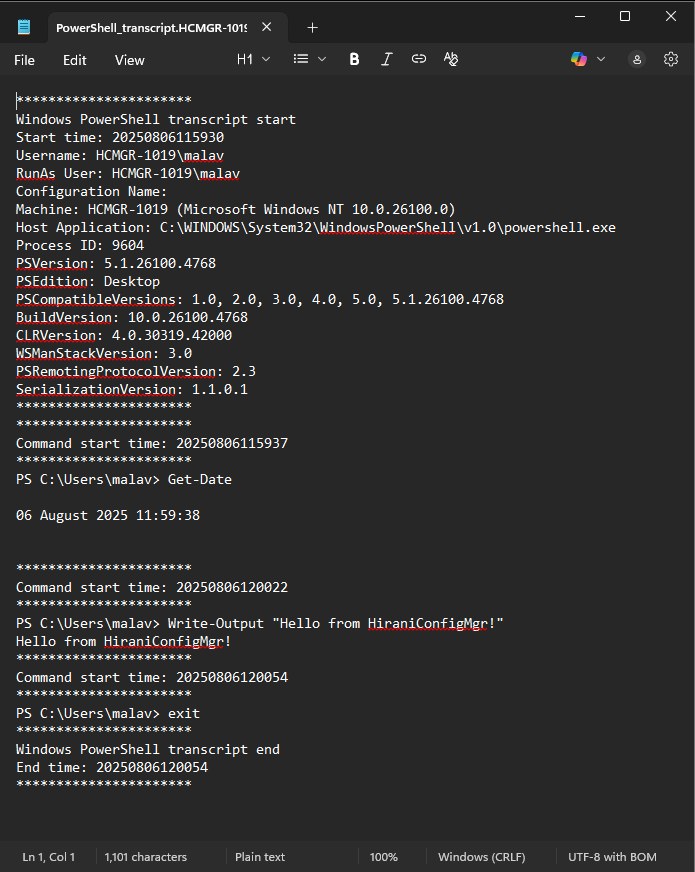
Open the file in a text editor to verify that it contains the commands and their outputs.
Best Practices
-
Secure Log Storage: Store transcription logs in a location with restricted access (e.g., C:\Windows\Logs). If using a file server, ensure only authorized personnel can access it.
-
Monitor Log Size: Transcription files can grow large over time. Implement a log rotation or cleanup policy to manage storage.
-
Protect Sensitive Data: Since transcriptions may capture sensitive information (e.g., passwords), encrypt network shares or restrict access to logs.
-
Test Regularly: Periodically verify that transcription is working by checking log files on target devices.
-
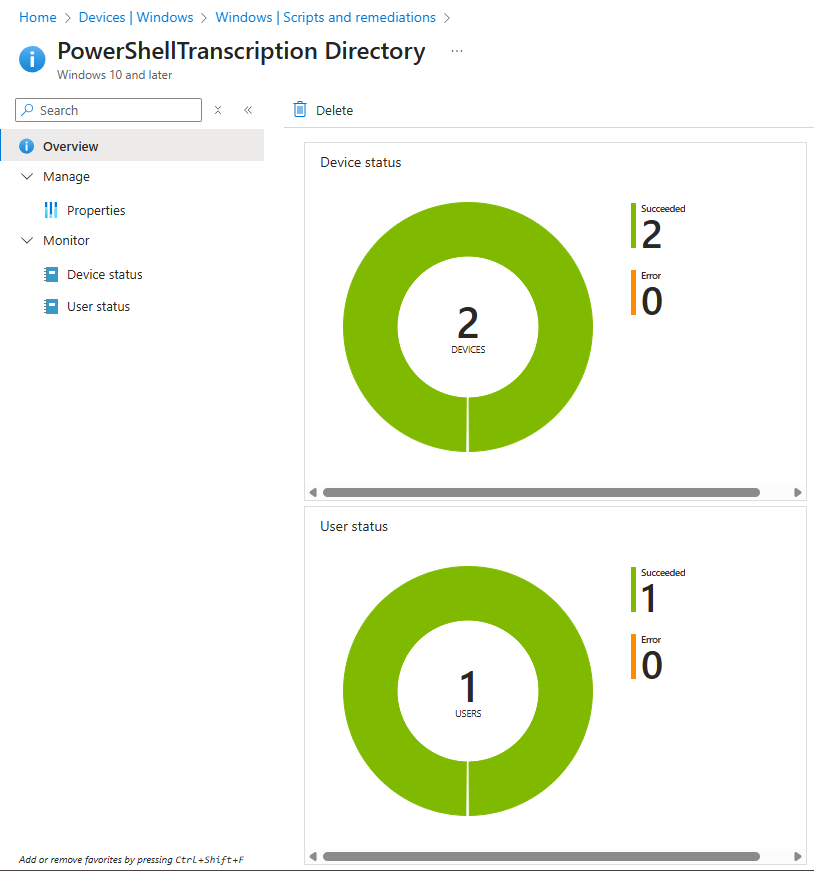
Use Intune Reporting: Monitor policy and script deployment status in Intune to ensure successful application across devices.
Conclusion
By following this guide, you’ve successfully configured PowerShell Transcription using Microsoft Intune, enhancing your organization’s ability to audit and debug PowerShell activities. You created a secure storage directory, deployed a configuration profile, and verified transcription logs. This setup ensures all PowerShell commands and outputs are logged, providing valuable insights for security and compliance.
If you found this guide helpful, consider sharing it with your network or exploring our other Microsoft Intune tutorials for more endpoint management tips!