In modern endpoint security, enforcing least-privileged access is a critical component of a Zero Trust strategy. Traditional approaches often grant users local admin rights – exposing systems to risks like malware escalation and misconfigurations.
Endpoint Privilege Management (EPM) in Microsoft Intune empowers organizations to implement a Zero Trust security model by enabling standard users to perform elevated tasks without requiring full administrator rights. This security solution helps organizations balance security requirements with user productivity by controlling and managing privilege elevation on managed endpoints.
Key Benefits
- Enhanced Security: Eliminates permanent admin accounts and reduces attack surface
- User Productivity: Self-service elevation for approved applications
- Audit & Compliance: Complete logging of all elevation activities
- Flexible Controls: Multiple approval workflows for different scenarios
Prerequisites and Licensing Requirements
Before implementing Endpoint Privilege Management, ensure your environment meets the following requirements:
Licensing Requirements
EPM requires licensing beyond the standard Microsoft Intune Plan 1 subscription. You have two options:
- Standalone EPM License: Adds only Endpoint Privilege Management capabilities
- Microsoft Intune Suite: Includes EPM along with other advanced features
Device Requirements
Your managed devices must meet these criteria:
Device Enrollment Status:
- Microsoft Entra Joined (formerly Azure AD Joined)
- Microsoft Entra Hybrid Joined
- Microsoft Intune enrolled or Configuration Manager co-managed devices
Understanding EPM Components
Endpoint Privilege Management consists of two primary policy types:
-
Elevation Settings Policy
Defines the default behavior for elevation requests on managed devices, including user validation requirements and reporting configurations.
-
Elevation Rules Policy
Creates specific rules for applications and files that can be elevated, defining conditions and validation requirements for individual executables.
Step 1: Deploying the Elevation Settings Policy (Core Enablement)
The Elevation Settings Policy defines how EPM behaves on Windows endpoints – including whether it’s enabled, how elevation prompts work, and reporting preferences.
Creating the Policy
Navigate to the Microsoft Intune admin center and follow these steps:
- Sign in to the Microsoft Intune admin center (https://intune.microsoft.com)
- Go to Endpoint Security → Endpoint Privilege Management → Policies
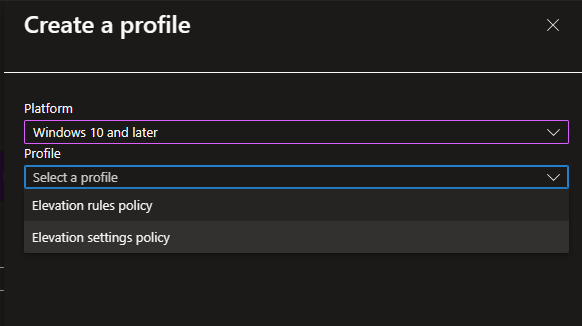
- Click Create Policy
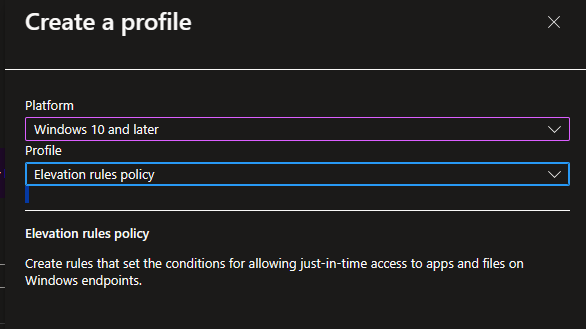
- Select:
-
- Platform: Windows 10 and later
- Profile: Elevation settings policy
5. Click Create
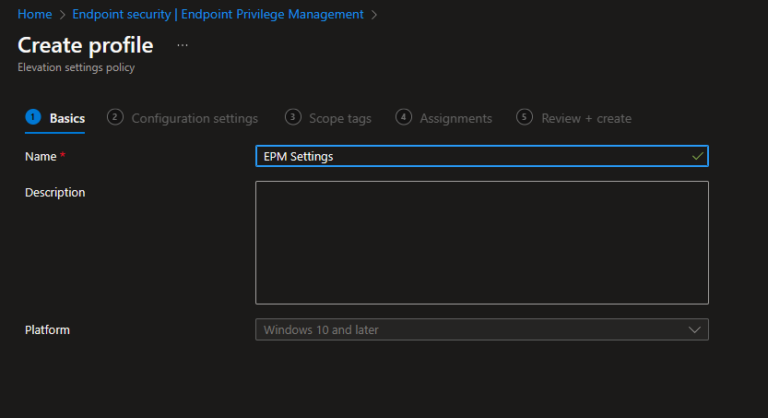
Configuring Basic Information
On the Basics page:
- Name: Enter a descriptive policy name (e.g., “
Corporate EPM Elevation Settings“) - Description: Provide a clear description of the policy’s purpose and scope
Configuring Policy Settings
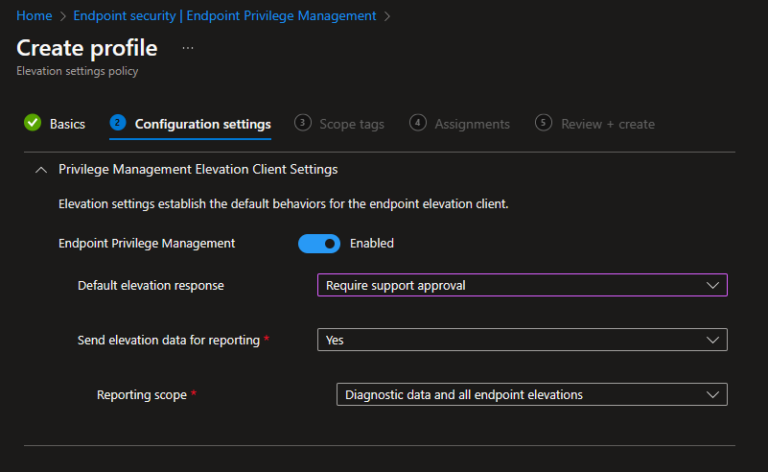
The Configuration Settings page contains critical options that define EPM behavior:
Endpoint Privilege Management:
- Set to Enabled to activate EPM functionality
Default Elevation Response:
Choose how the device handles elevation requests for unmanaged files:
- Deny all requests: Blocks elevation attempts with a notification to the user. Users with existing admin rights can still use “Run as administrator“
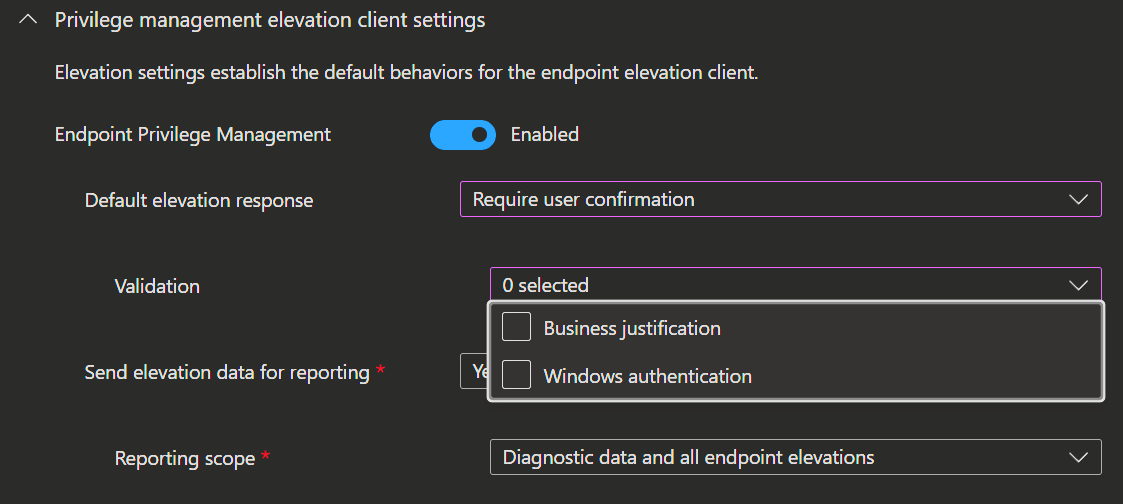
- Require user confirmation: Prompts the user to confirm their intent before elevation
- Require support approval: Implements a workflow where requests must be approved by IT support before execution
Validation Options
When using “Require user confirmation“, you can add additional security layers:
Business Justification:
- Requires users to provide a written justification for the elevation
- Justifications are logged and available for audit and compliance reviews
Windows Authentication:
- Requires users to authenticate using their organizational credentials
- Provides an additional verification layer before elevation
Reporting Configuration
Send Elevation Data for Reporting:
- Set to Yes to enable comprehensive logging and reporting
- Set to No to disable elevation data collection
Reporting Scope:
Choose the level of data collection:
1.Diagnostic data and all endpoint elevations (Recommended):
-
- Reports all elevation attempts, including unmanaged applications
- Provides comprehensive visibility for security analysis
- Helps identify additional applications that should have elevation rules
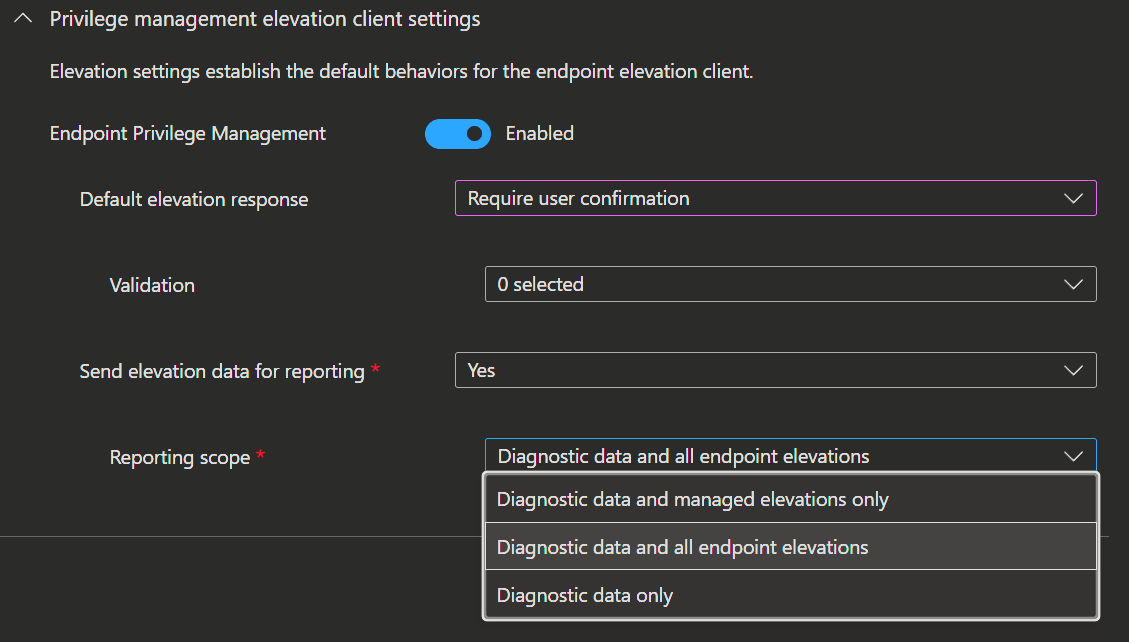
2. Diagnostic data and managed elevations only:
-
- Reports only elevations for applications with defined rules
- Reduces data collection while maintaining visibility of controlled elevations
3.Diagnostic data only:
-
- Collects only operational data for EPM itself
- No information about specific file elevations is reported
Scope Tags and Assignments
Scope Tags (Optional):
- Apply scope tags if your organization uses role-based administration
- Leave as default if scope tags are not required
Assignments:
- Click Next to proceed to the Assignments page
- Under Included Groups, click Add Groups
- Select the device or user groups that should receive this policy
- You can assign to both device groups and user groups
- Click Next
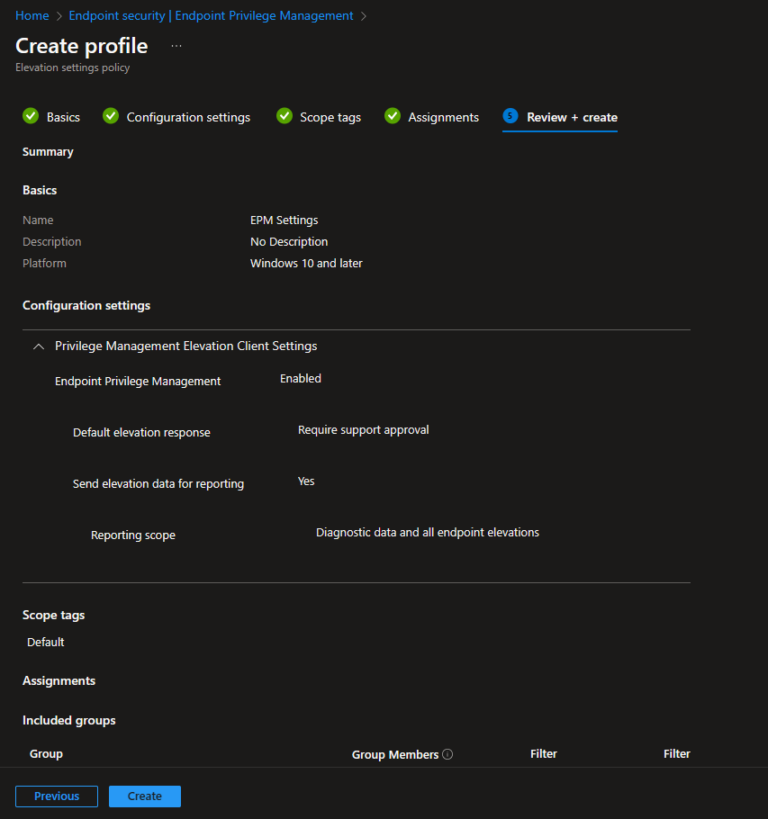
Review and Create
- Review all configured settings carefully
- Verify the assignment targets
- Click Create to deploy the policy
Step 2: Create Elevation Rules Policy
Elevation rules define which specific applications can be elevated and how.
Configuration Steps
- Go to Endpoint security > Endpoint Privilege Management > Policies
- Click Create policy
- Select Platform: Windows 10 and later
- Select Profile: Windows elevation rules policy
- Enter policy name: “EPM-Application-Rules”
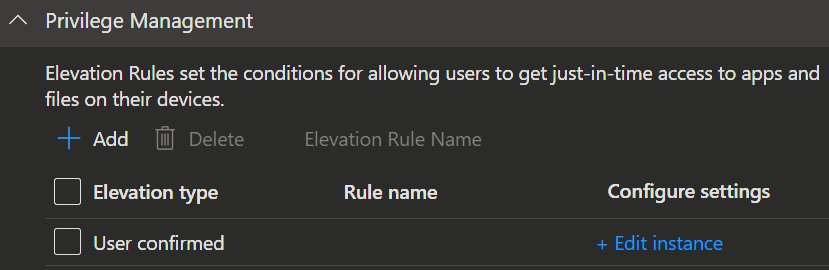
Adding Rules
Click Add to create each rule:
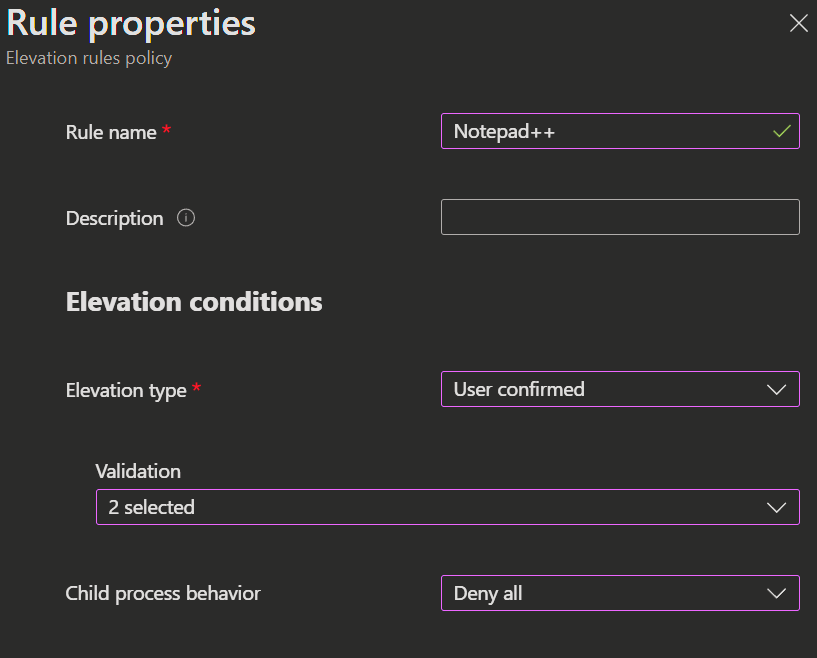
Rule Properties:
- Rule name: Descriptive name (e.g., “
Elevate Notepad++“) - Description: Document the application and purpose
Elevation Type (Choose one):
- User confirmed (
Recommendedfor most apps)
-
- User receives confirmation prompt
- Optional: Require business justification
- Optional: Require Windows authentication
2. Automatic (Use cautiously)
-
- Silent elevation without user interaction
- Best for frequently-used, trusted applications
3. Support approved
-
- Requires IT admin approval
- Best for sensitive applications
Child Process Behavior:
- Allow all child processes to run elevated
- Require rule to elevate
- Deny all
- Not configured
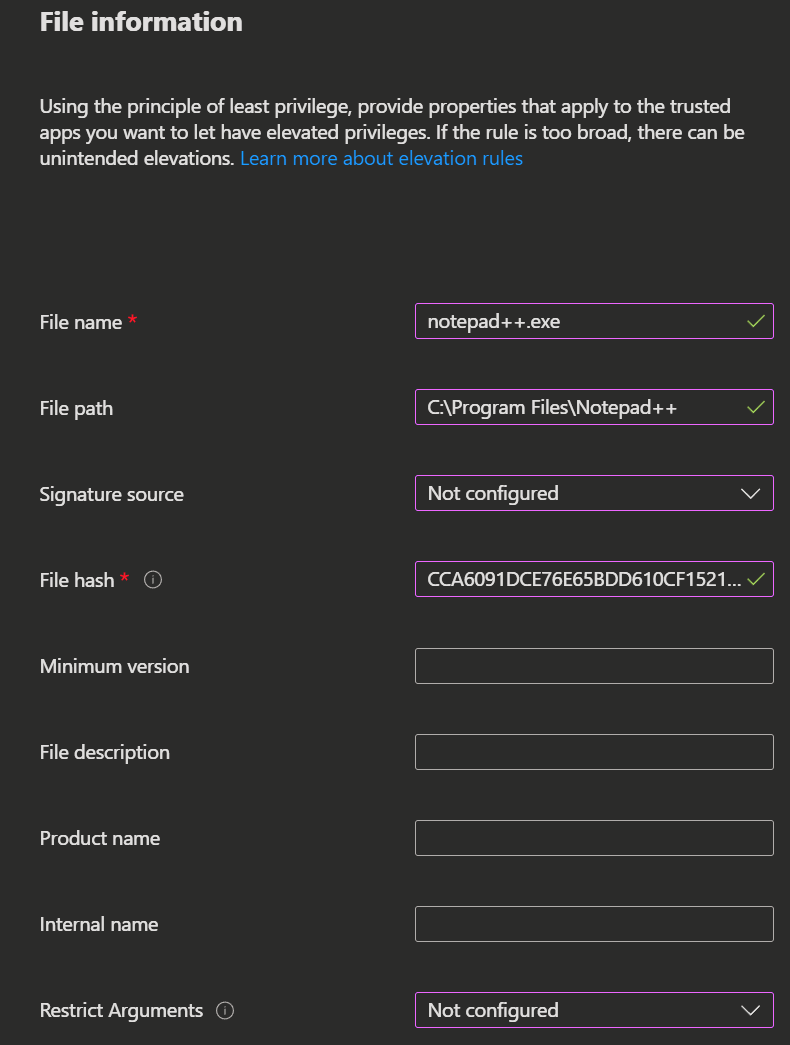
File Information
Required Fields:
- File name: Include extension (e.g.,
notepad++.exe) - File path: Enter the file path of the application, leave blank if location varies
Validation Method (Choose one):
Option 1: Using Certificates (Recommended)
- Signature source: Upload certificate file or use reusable settings
- Certificate type: Publisher or Certificate authority
Extract certificate using PowerShell:
# Extract publisher certificate from an executable

(Get-AuthenticodeSignature ".\application.exe").SignerCertificate | Export-Certificate -Type CERT -FilePath ".\app-cert.cer" 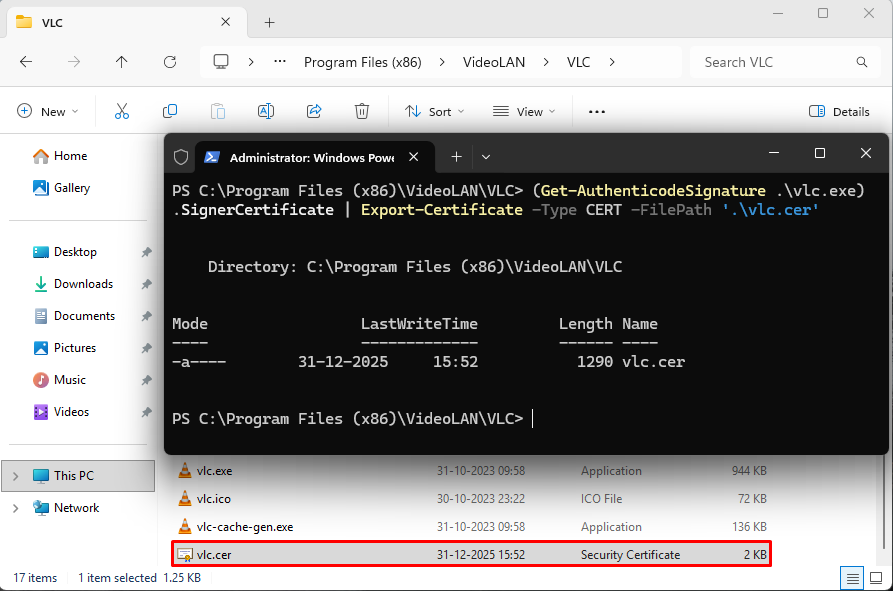
Option 2: Using File Hash
- Required when not using certificates
Get file hash using PowerShell:
# Get SHA256 hash of a file

Get-FileHash -Path ".\application.exe" -Algorithm SHA256 
Complete the Policy
- Click Save after each rule
- Add additional rules as needed
- Click Next, assign to groups
- Review and Create
Admin Approval Process
- Go to Endpoint security > Endpoint Privilege Management > Elevation requests
- Review pending requests showing:
-
- User and device information
- Application details
- Windows or Business justification
3. Click on request to view details
4. Click Approve or Deny
5. Enter admin justification
6. Submit decision
Approval Duration: 24 hours from approval time
Quick Actions:
- Add to reusable settings: Save certificate for future policies
- Create a rule: Generate elevation rule from this request
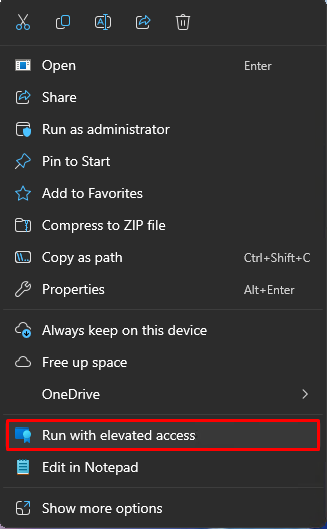
User Experience
Context Menu Integration
After EPM policy applies, users see new option when right-clicking executable files:
- Run with elevated access (EPM option)
![]()
Elevation Workflow
User-Confirmed:
- Right-click file > Run with elevated access
- Confirm intent (and provide justification if required)
- Application launches elevated
Automatic:
- Right-click file > Run with elevated access
- Application launches immediately
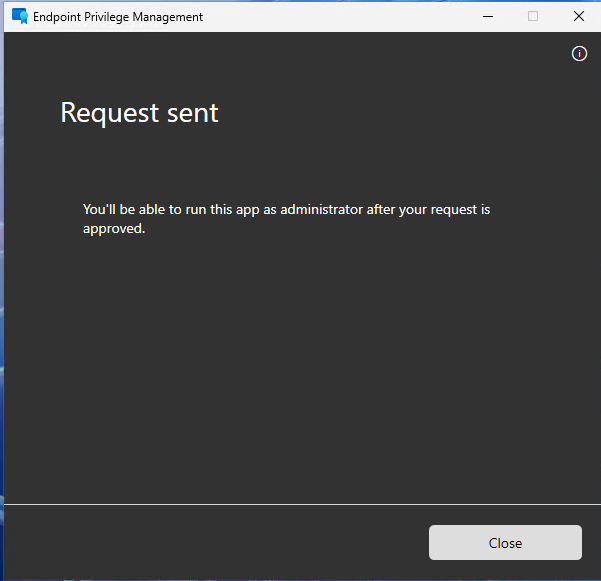
Support-Approved:
- Request elevation with justification
- Wait for notification
- After approval, elevation works automatically for 24 hours
Quick Reference
Elevation Types Comparison
| Type | User Action | Use Case | Security Level |
| Automatic | None | Trusted business apps | Medium |
| User Confirmed | Confirmation + optional justification | Most applications | High |
| Support Approved | Submit request, wait for approval | Sensitive/high-risk apps | Highest |
Monitoring and Reporting
Access Reports
Navigate to Endpoint security > Endpoint Privilege Management > Reports
Available Reports:
- Elevation report: All elevation attempts (managed and unmanaged)
- Managed elevation report: Policy-controlled elevations only
- Elevation by application: Grouped by application
- Elevation by publisher: Grouped by software publisher
- Elevation by user: Grouped by user account
Conclusion
Endpoint Privilege Management enables organizations to implement Zero Trust least privilege principles while maintaining user productivity. By following this guide, you can successfully deploy EPM with appropriate policies, monitoring, and governance.