
Managing default application associations is a critical aspect of enterprise device management. When users click on email links, open compressed files, or access web content, organizations need to ensure the correct applications launch automatically. Microsoft Intune provides a robust, cloud-based solution to standardize these default app settings across all Windows devices in your organization.
This comprehensive guide walks you through the complete process of configuring default application associations using Microsoft Intune’s Settings Catalog or custom OMA-URI policy. Whether you’re setting Microsoft Edge as the default browser, configuring Outlook as the default email client, or associating 7-Zip as default app for opening compressed files, this method gives you granular control over file type and protocol associations.
What You’ll Learn:
- How to export existing default app configurations from a reference device
- The process of encoding XML data to Base64 format for Intune deployment
- Creating and deploying custom configuration profiles using Settings Catalog & OMA-URI settings
- Monitoring policy deployment and verifying successful implementation
What Are Default Application Associations?
Default application associations define which application opens when a user interacts with specific file types or protocols on Windows devices. For example, when a user clicks on a .pdf file, the association determines whether Adobe Acrobat, Microsoft Edge, or another PDF reader launches.
Why Organizations Need Centralized Control
- Consistency Across the Enterprise
- Security and Compliance
- Productivity Enhancement
- Reduced IT Support Burden
Prerequisites
- Administrative access to Microsoft Intune Admin Center
- Windows 10/11 devices enrolled to Intune
- Devices must be Entra joined or Entra Hybrid Joined
- A reference Windows device with desired applications installed and configured
Step-1: Set Default Apps on a Reference Machine
- Log in to a Windows 10/11 reference machine.
- Open Settings → Apps → Default Apps.
- Manually configure desired defaults (e.g.,
.pdfwith Acrobat,MAILTO,.emlwith Outlook,.7z,.zip&.tarwith 7-Zip).
- This step ensures that the exported file includes all desired defaults.
Step-2: Export Default App Associations to XML
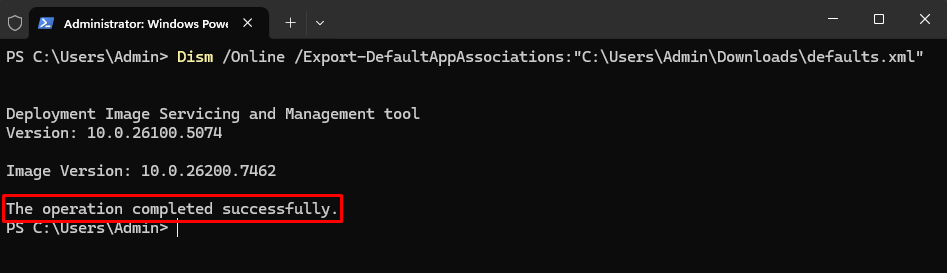
- Run PowerShell as Administrator.
- Execute:
Dism /Online /Export-DefaultAppAssociations: "<pathname/filename.xml>" Note: Avoid deleting required associations for common file types unless intentional.
Some admins remove unused entries to avoid unintended overrides.
Step-3: Encode XML to Base64
Microsoft Intune requires the default associations file in Base64 format.
How to convert to Base64:
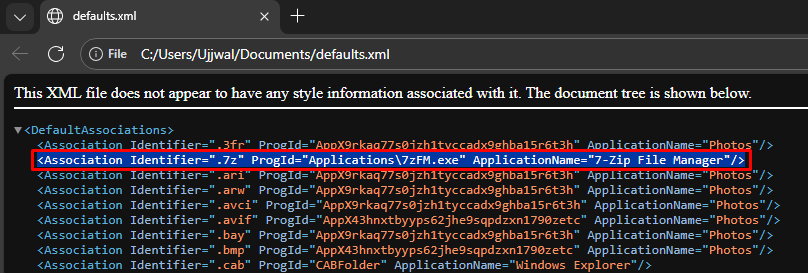
- Open the XML file.
- Copy the XML content of which the default app association is required.
3. Use an online or offline encoder like:
4. Paste the copied xml text in the Encoder by referencing the below syntax:
<?xml version="1.0" encoding="UTF-8"?>
<DefaultAssociations>
<Association Identifier=".7z" ProgId="Applications\7zFM.exe" ApplicationName="7-Zip File Manager"/>
<Association Identifier=".zip" ProgId="Applications\7zFM.exe" ApplicationName="7-Zip File Manager"/>
<Association Identifier=".tar" ProgId="Applications\7zFM.exe" ApplicationName="7-Zip File Manager"/>
</DefaultAssociations>
5. Ensure that UTF-8 is selected
6. Click on “Encode“
7. Copy the Base64 text.
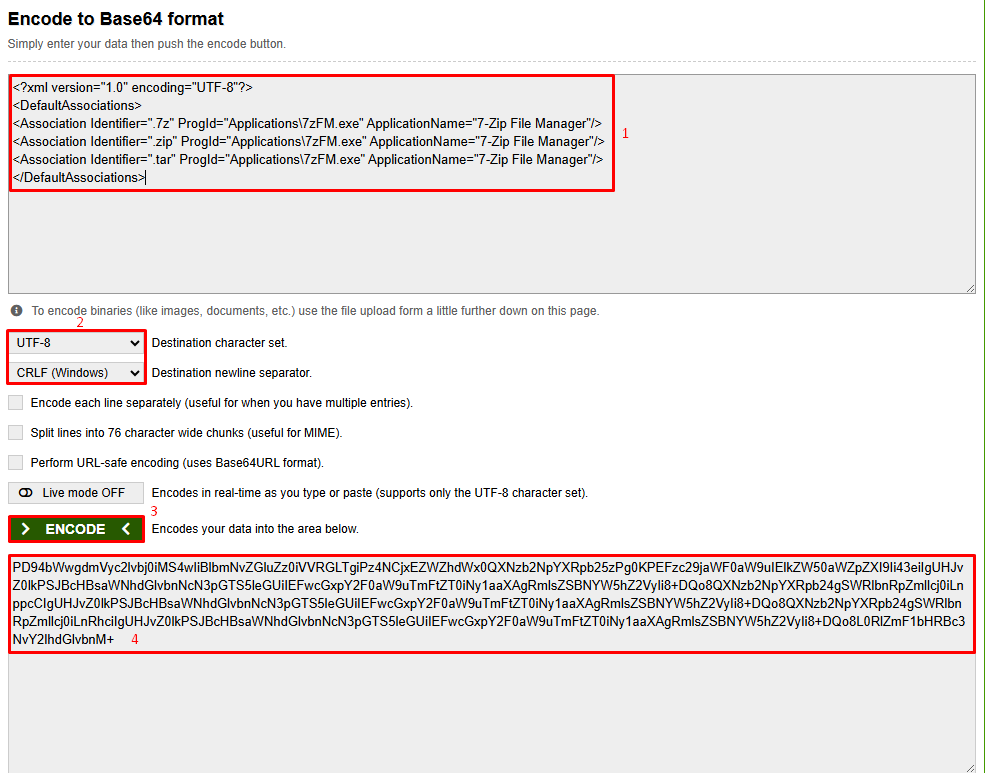
- You will paste this text into your Intune configuration profile.
Step-4: Create Intune Configuration Profile
Option A – Settings Catalog (Recommended)
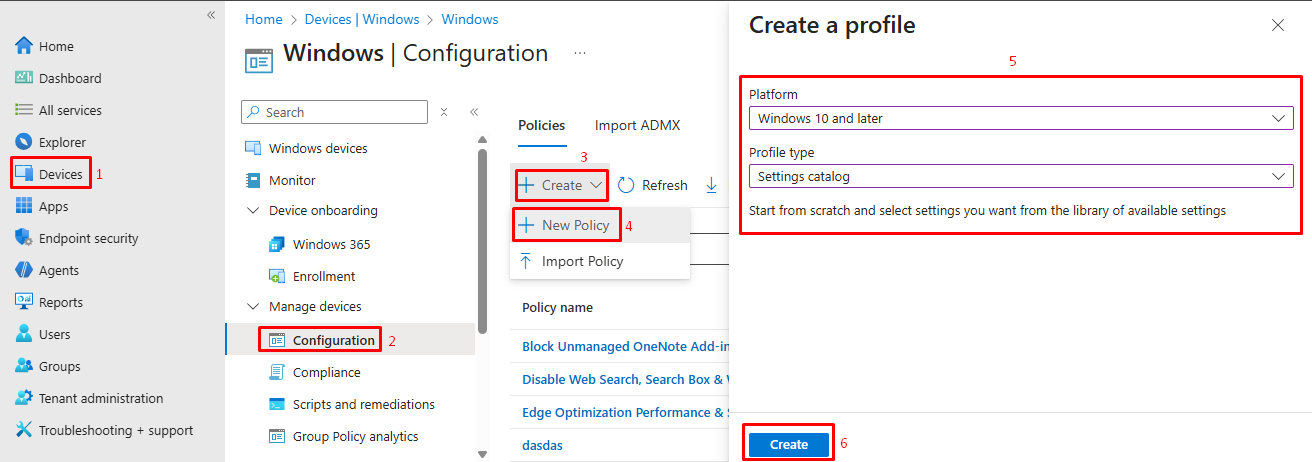
- Go to Intune Admin Center → Devices → Configuration profiles.
- Click Create profile.
- Choose:
- Platform: Windows 10 and later
- Profile type: Settings catalog
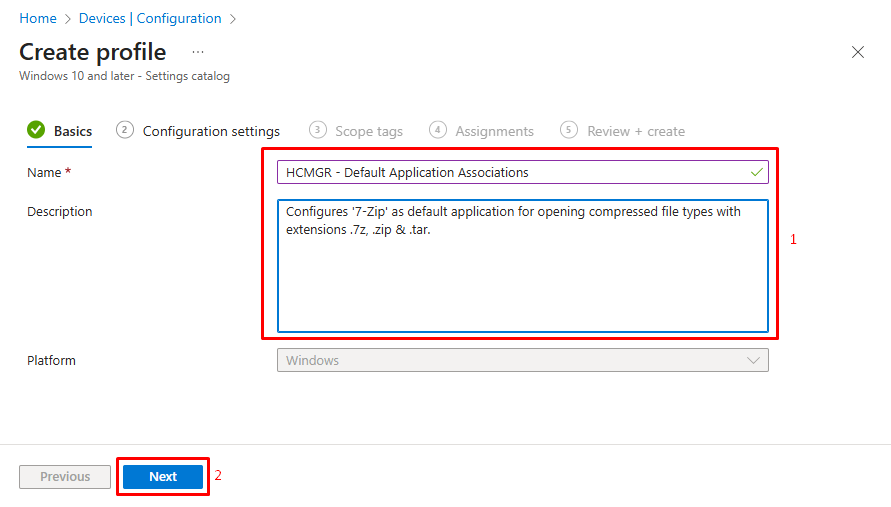
4. Configure Basics
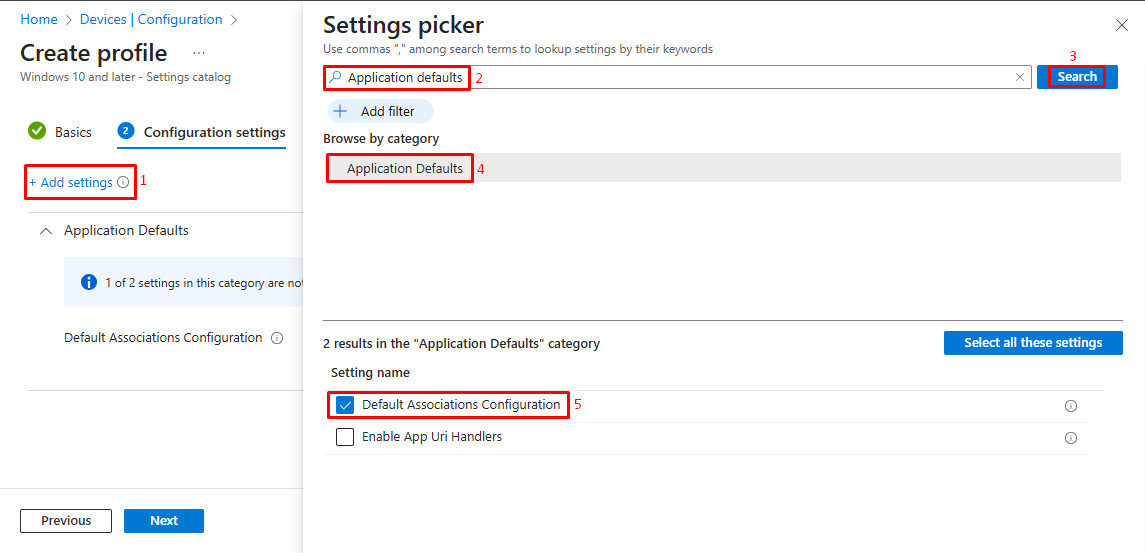
5. Click Add settings and search for Application Defaults.
6. Click Application Defaults Category and select Default Associations Configuration.
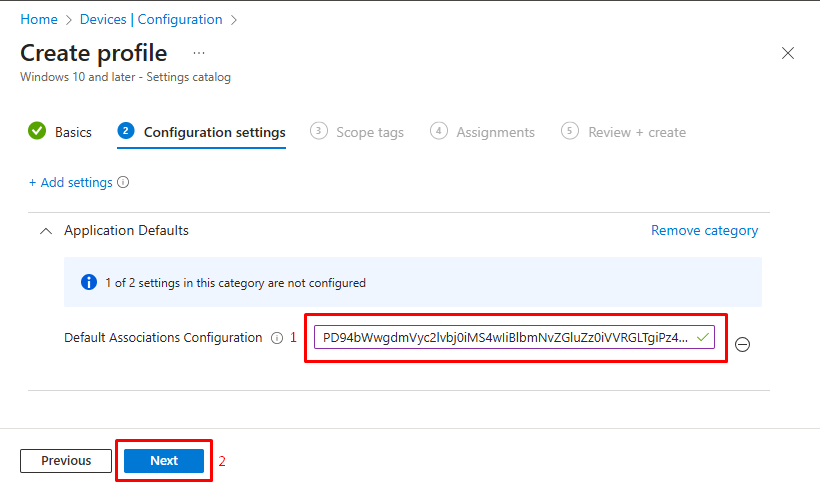
 7. Paste the Base64 encoded XML into the text box.
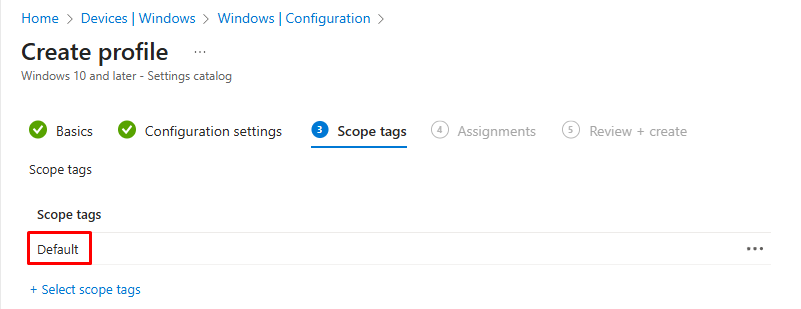
8. Apply scope tags if your organization uses role-based administration.
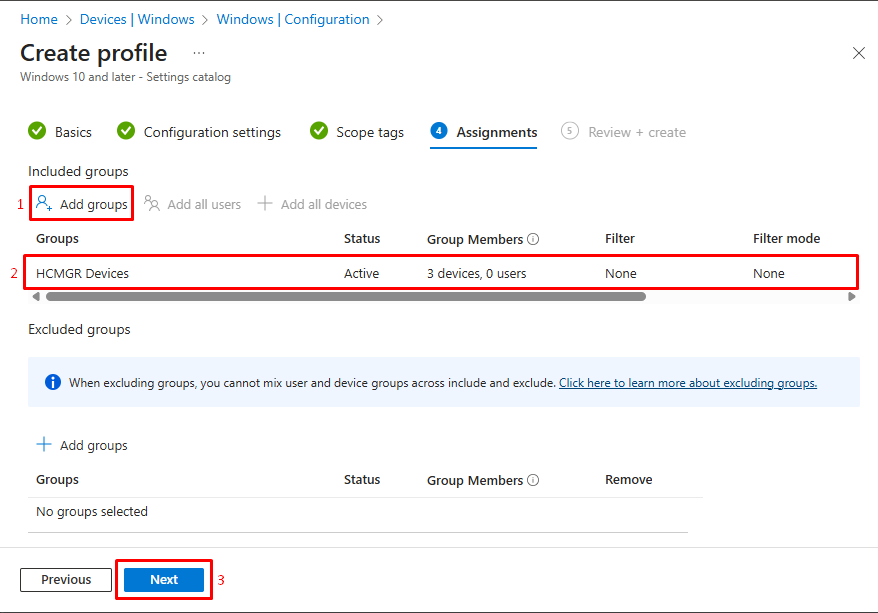
9. Assign to desired device groups.
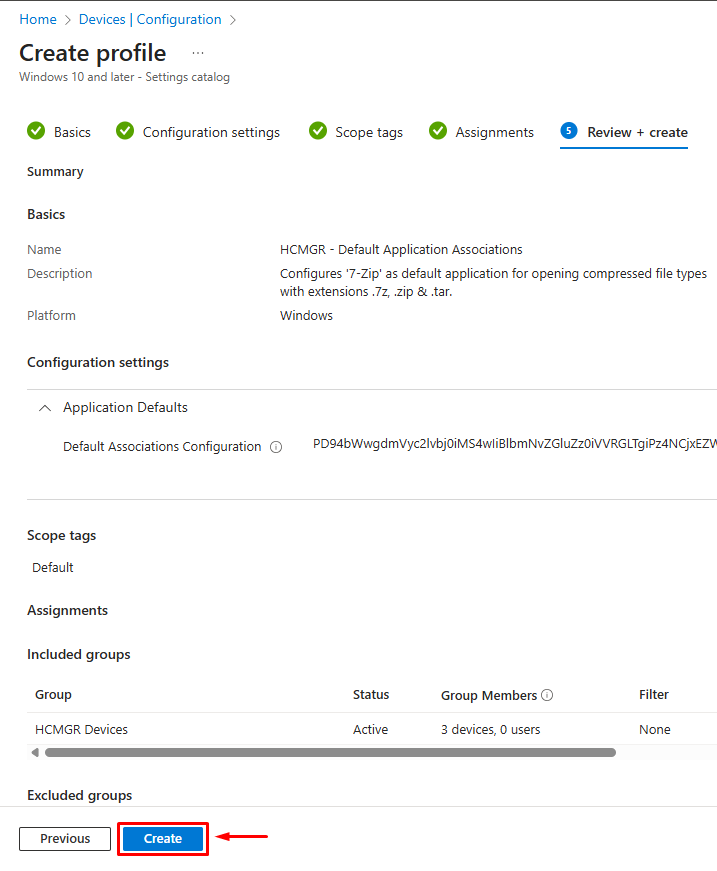
10. Review and Create.
Option B – OMA-URI (Alternative)
- Create a Custom profile instead of a Settings catalog.
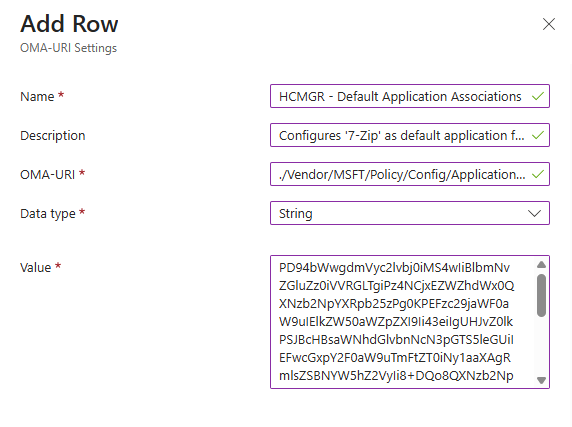
- Add a new setting:
- Name: Default App Associations
- OMA-URI:
./Vendor/MSFT/Policy/Config/ApplicationDefaults/DefaultAssociationsConfiguration
- Data Type: String
- Value: Paste Base64 encoded text
3. Assign it similarly.
- This method uses the Policy CSP ApplicationDefaults under the hood.
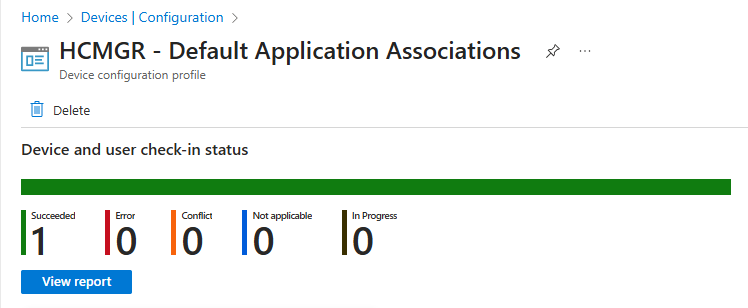
Step-5: Monitor and Validate Deployment
- Navigate back to Devices > Configuration > Policies
- Locate your newly created policy in the list
- Click on the policy name to open its details
- Review the deployment status showing:
-
- Number of users or devices assigned
- Success, error, or pending status
- Any conflicts with other policies
Verify End-User Experience
Check Default App Settings
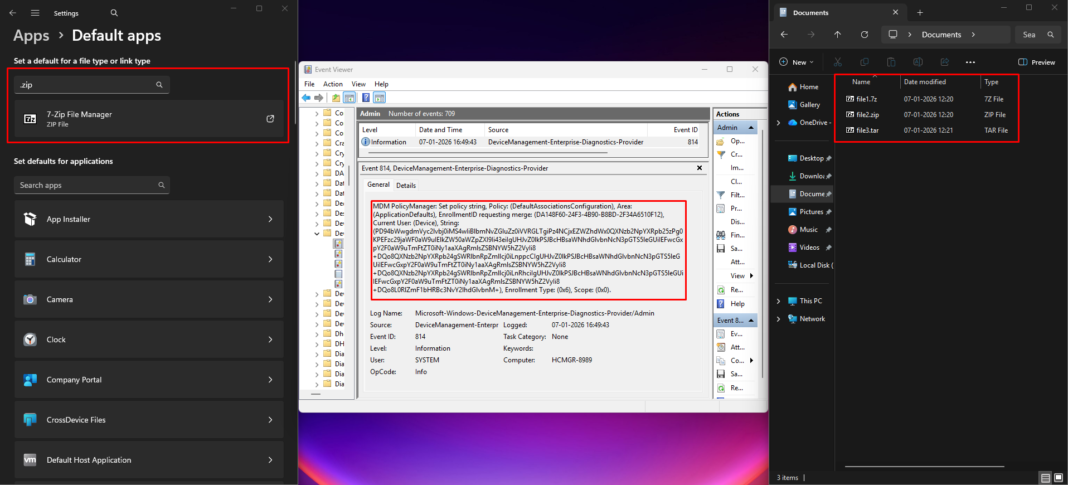
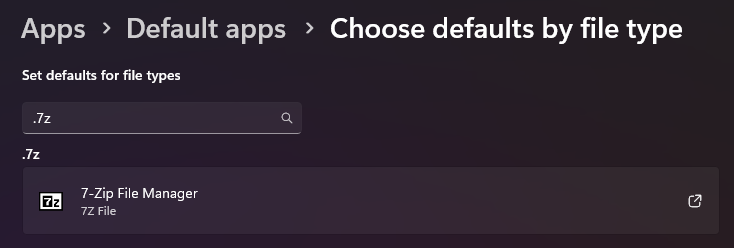
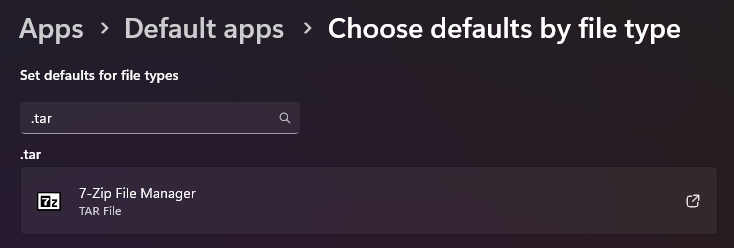
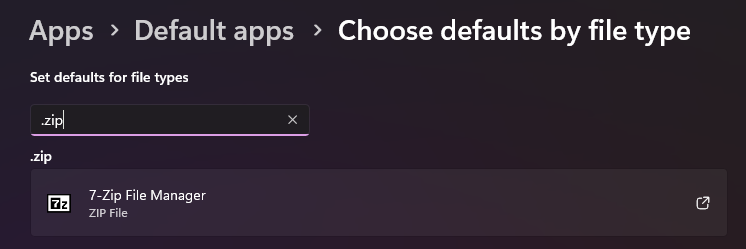
- Open Windows Settings by pressing Windows + I, then navigate to Apps > Default apps. Here you should see your configured applications listed as defaults.
Test File Type Associations
- Test
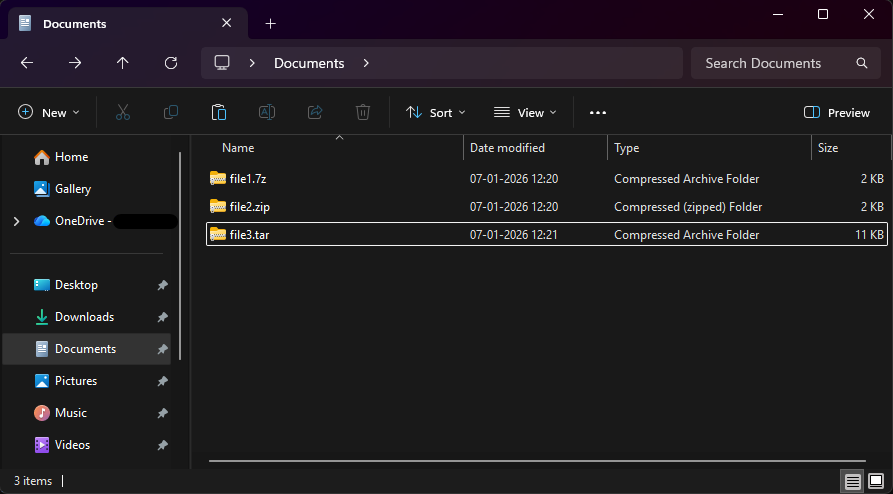
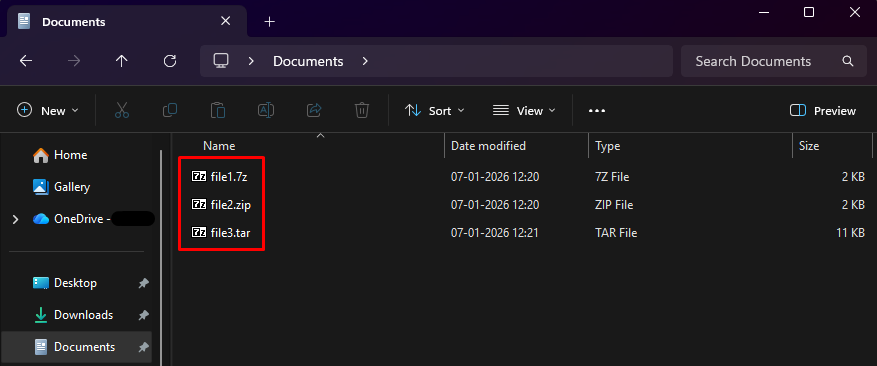
.7z,.zip&.tarfiles: open each compressed document and confirm the designated default application launches.
Before deploying Default Application Association Policy:
After deploying Default Application Association Policy:
Conclusion
Deploying default app settings via Microsoft Intune ensures consistent user experience and helps meet organizational standards. While the process uses a few technical steps – especially around XML export and Base64 encoding – this centralized method saves admin time and prevents inconsistent configurations across devices.