Discover how to effortlessly disable misspelled word underlines and Auto-Correct on Windows 10+ devices using Intune Settings Catalog policies.
If you’re an IT admin tired of users complaining about intrusive spell-check features, this guide is your roadmap. We’ll walk through disabling both the misspelled word highlight (those annoying squiggles) and Auto-Correct across Windows 10 and later devices. By the end, you’ll have tailored policies that keep things smooth and professional. Let’s dive in.
Why Bother Disabling Spell Check and Auto-Correct?
Before we get hands-on, consider the upsides:
- Fewer Interruptions: Red underlines can pull focus during typing marathons in apps like Word, Teams, or even the browser.
- Accuracy Over Assumptions: Auto-Correct might “fix” industry jargon or names, leading to errors in reports or emails.
- Uniform Experience: Enforce settings enterprise-wide, ensuring compliance without per-device tweaks.
- User Empowerment: Ironically, turning these off gives users more control over their workflow.
These tweaks are especially handy for remote or hybrid teams where device consistency is key. Plus, they’re reversible if needed – no permanent damage done.
Prerequisites
- Access to the Microsoft Intune admin center (intune.microsoft.com) with policy creation permissions.
- Target devices running Windows 10/11, enrolled in Intune.
- A test group of users/devices to pilot the changes-safety first!
No extra downloads or tools required; everything lives in the Settings Catalog under Administrative Templates.
Step-by-Step: How to Configure in Intune
Follow these steps in your Intune portal to deploy these settings across devices:
- Sign in to Intune Admin Center
- You need at least “Policy and Profile Manager” role permissions.
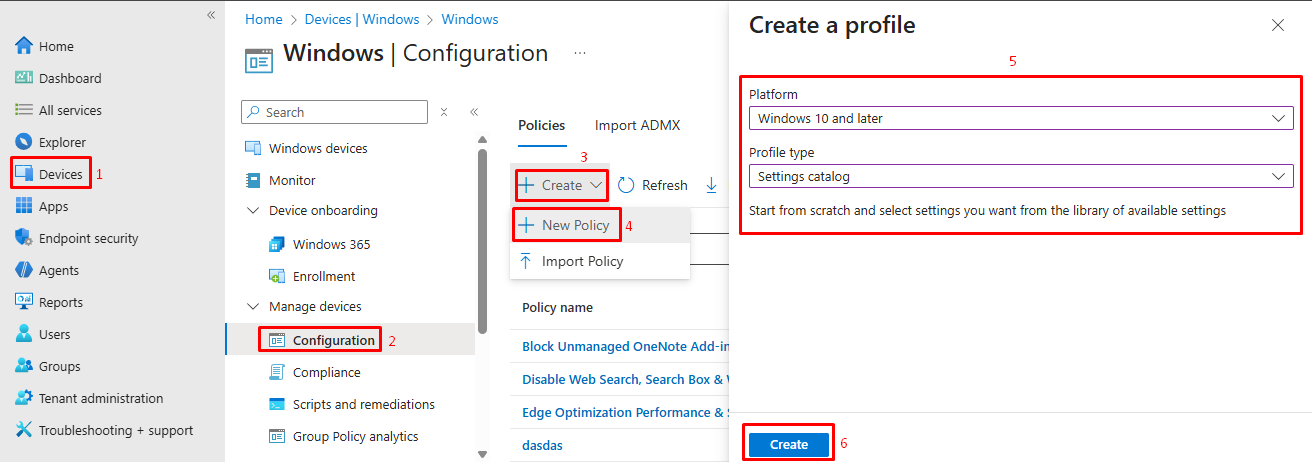
2. Create a new Settings Catalog policy
- Navigate to Devices → Configuration → Create → New Policy.
- Set Platform = Windows 10 and later, Profile type = Settings catalog.
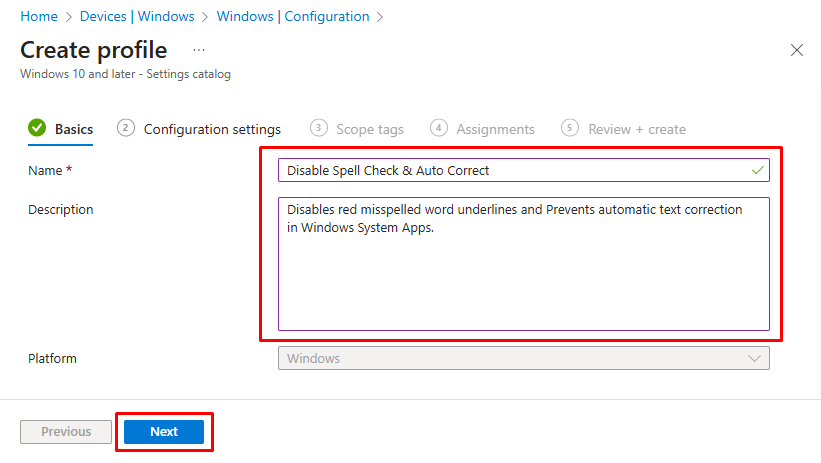
3. Configure Basic Policy Details
- In the Basics tab, enter the following information:
- Name: Give the policy a clear Name
- Example:
Disable Spell Check & Auto Correct
- Example:
- Description: A clear description of the policy purpose
- Example:
Disables red misspelled word underlines and Prevents automatic text correction in Windows System Apps.
- Example:
- Name: Give the policy a clear Name
4. Add the required Configuration Setting
-
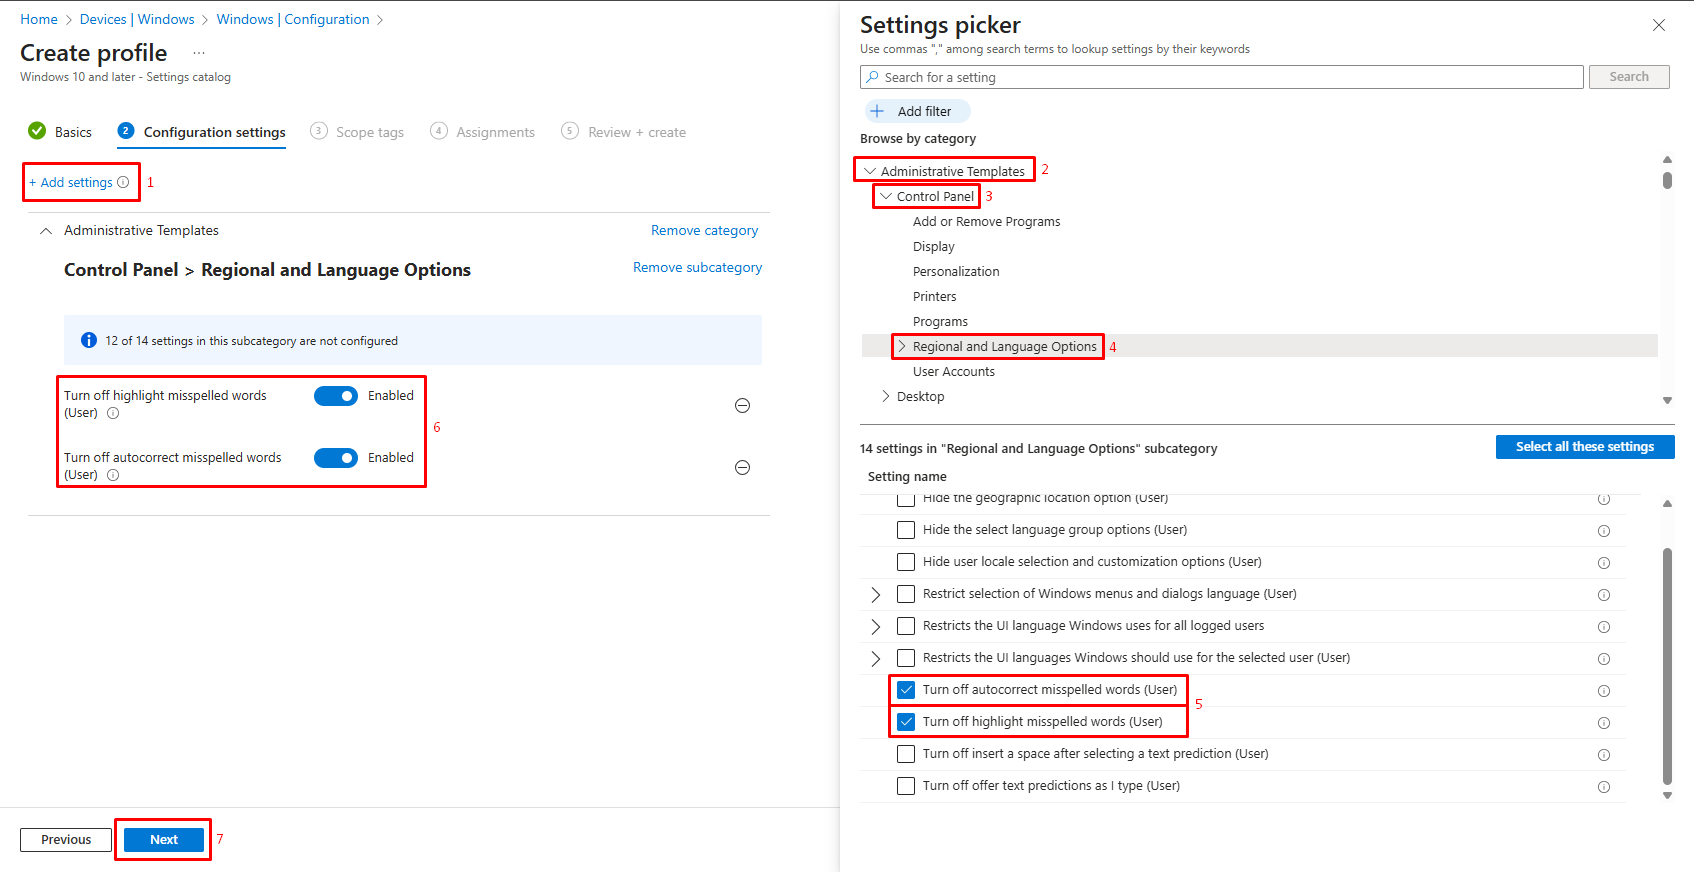
- On the Configuration settings tab, click + Add settings
- The Settings Picker opens
- Navigate using the category path (or search function):
- Administrative Templates → Control Panel → Regional and Language Options → Turn off highlight misspelled words (User)
- Click to select Turn off highlight misspelled words
- Then, again Navigate using the category path (or search function):
- Administrative Templates → Control Panel → Regional and Language Options → Turn off Autocorrect Misspelled Words
- Select Turn off Autocorrect Misspelled Words
5. Configure the Policy State
You are now viewing the configuration for the selected settings.
- Observe the toggle switch (initially in disabled/gray state by default)
- toggle the switch from left to right (or click it)
- Verify the toggle turns blue and displays Enabled
- Click Next
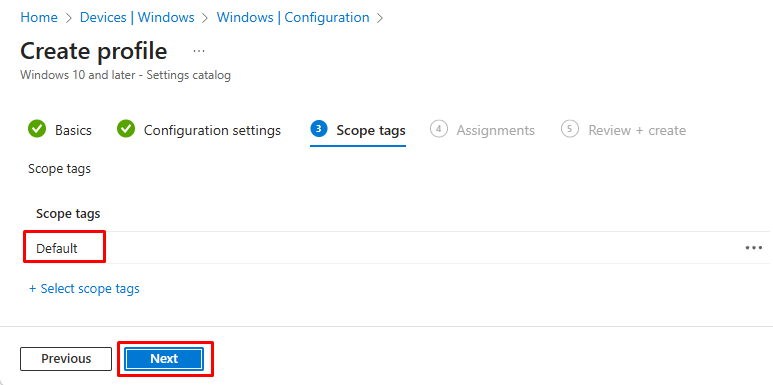
6. Configure Scope Tags (Optional)
-
- If using scope tags, click + Add and select appropriate tags for administrative access control
- This step is optional and typically skipped unless your organization uses administrative role segregation
- If not using scope tags, click Next
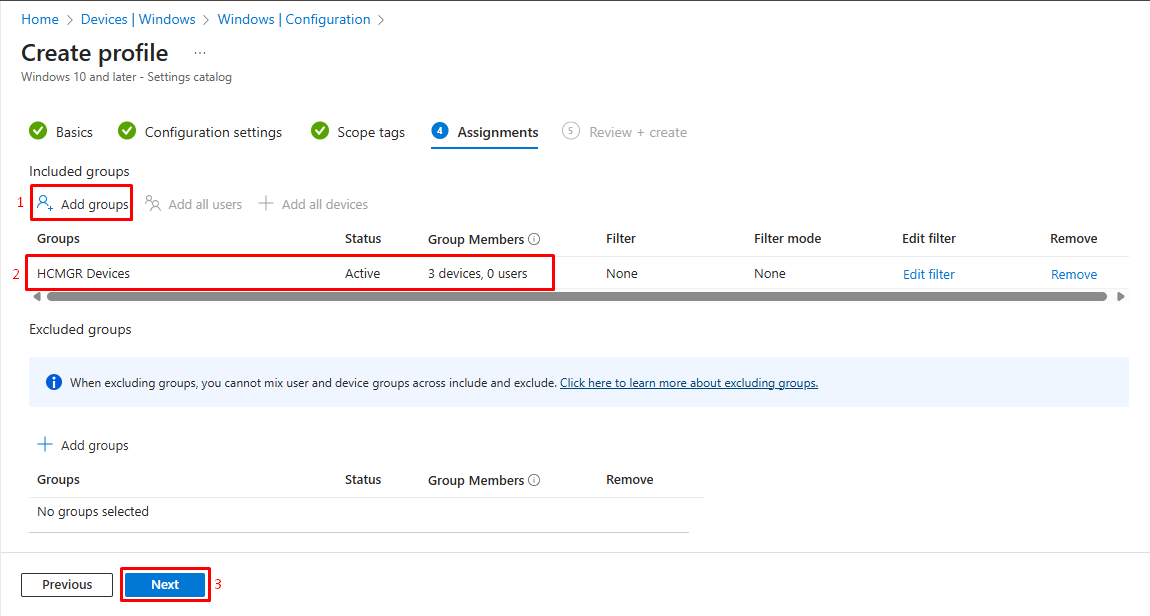
7. Assign the Policy to Target Groups
-
- Under Included groups, click + Add groups
- Select the security group(s) that should receive this policy
- Click Select to confirm group selection
- Click Next
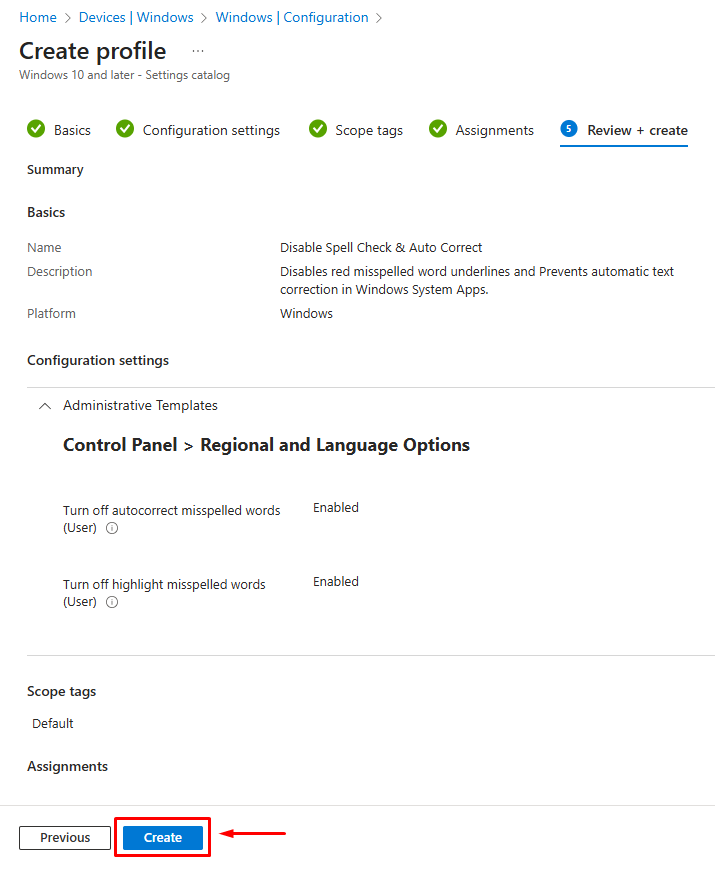
8. Review and Create the Policy
-
- Verify all settings:
- Policy name and description
- Platform (Windows 10 and later)
- Configuration state (Enabled)
- Assigned groups
- If corrections are needed, click Previous to navigate back and edit
- Click Create to deploy the policy
- Verify all settings:
You should receive a confirmation message indicating successful policy creation.
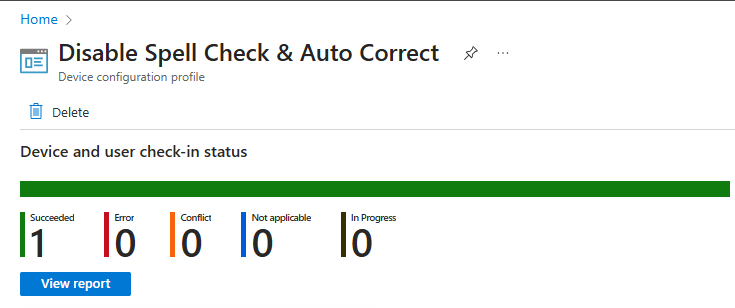
Monitoring Policy Deployment Status
Checking Intune Portal Status
- Navigate to Devices → Configuration
- Search for or locate your newly created policies by name
- Click on each policy to view deployment status
- The details pane shows:
- Total devices targeted
- Devices with successful application
- Devices with pending application
- Any devices with failures
Note: Initial policy sync can take 15-30 minutes. Allow time before investigating failures.
Applications That ARE Affected
These system-level policies affect:
- Notepad (Older app not the modern Store-based) – spelling underlines and autocorrect controlled by these policies
- WordPad – respects these system settings
- Windows Text Input – any basic text input field in Windows (search bars, file dialogs, etc.)
- Built-in Windows applications that use the default Windows spelling engine
Why Office Applications Are Not Affected
Microsoft Office applications include their own robust spelling engines that operate independently from Windows system-level settings. They have their own configuration options within each application’s settings menu. If you need to control spelling behavior in Office applications, you would need to:
- Configure Office-specific Group Policies (if available)
- Use Microsoft Office configuration profiles in Intune
- Manage settings within each Office application individually
Third-Party Applications
Most third-party applications (Google Chrome, Firefox, Adobe applications, etc.) either:
- Use their own built-in spelling systems
- Integrate with Windows spelling only partially
- Maintain completely independent spell-checking
The effect on third-party apps varies by application design.
Chat & Collaboration Tools (Partial):
- Slack (Windows Desktop – Win32 version)
Uses OS spell check in some text fields - Skype (classic desktop client)
- Cisco Jabber (Win32)
- Zoom (chat text boxes – Win32 client)
⚠️ Some Electron apps can switch between OS spell check and their own dictionary depending on version.
Business & Line-of-Business (LOB) Apps:
- SAP GUI for Windows
- Oracle Forms / Oracle E-Business Suite clients
- Citrix-published Win32 applications
- Custom in-house WinForms/WPF apps using:
- TextBox
- RichTextBox
- Windows Spell Check API (ITextServices, ISpellChecker)
Key Takeaway
These Intune policies are system-level controls that affect only Windows’ default text correction behavior. They do not cascade down to applications that implement their own spelling engines. This is important when planning your deployment-if your organization relies heavily on Microsoft Office, disabling these Windows policies won’t prevent autocorrect in Word or other Office apps.